Guides
Part of Bank transfer guide: ACH, wire, instant payment, and internal transfer rails
How to choose and verify a bank transfer method
Match a bank transfer method to the payment's deadline, value and recipient, then verify the account details and fees before the money leaves.
What to take away
- The rail decides the timeline, the fee and how hard the payment is to pull back. Pick it before you pick the app.
- Ask the provider to name the rail behind its label. "Instant" and "same day" describe different networks with different cutoff times.
- Confirm new or changed recipient details by calling a number you already had, never the one in the message that changed them.
- A test payment proves the details on the day you send it. It does not authorize a later change.
- Keep the confirmation, trace number, approval record and the recipient's own posting confirmation together.
A payroll run, an emergency payment to family, a home closing and a transfer between your own accounts are four different jobs. They do not want the same rail.
Name the payment job first
Write one line before you open the app:
Pay verified supplier North Shore Parts $7,850 in U.S. dollars by 3 p.m. Eastern on September 24, with dual approval and a recipient-bank confirmation.
That line fixes the deadline, the currency, the evidence you need and who signs off. Everything after it is a comparison against a stated requirement instead of a feeling about speed.
Ask which rail is actually underneath
A bank's menu may offer several payment types:
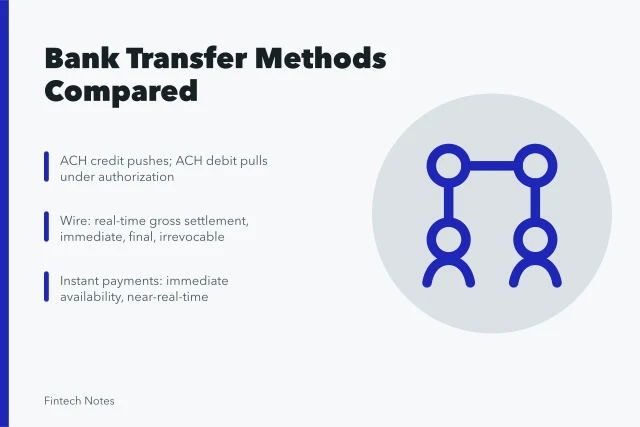
Payment Rails Compared
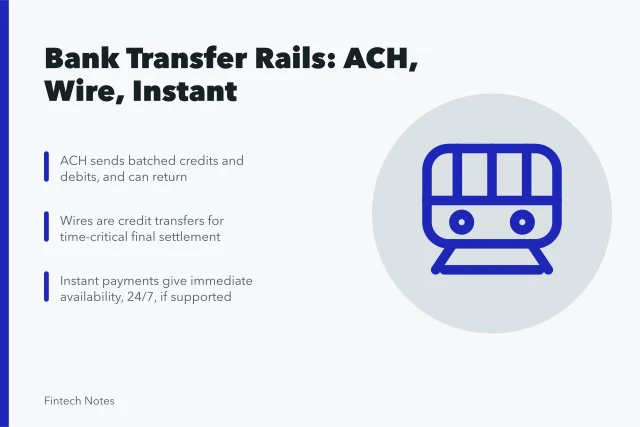
ACH
- Cutoff
- Batch deadline
- Fee
- Low
- Recovery
- Return rules
- Settlement
- Next day
Wire
- Cutoff
- Bank cutoff
- Fee
- High
- Recovery
- Recall difficult
- Settlement
- Same day
Instant
- Cutoff
- 24/7
- Fee
- Low
- Recovery
- Irrevocable
- Settlement
- Seconds
Card Payout
- Cutoff
- Provider cutoff
- Fee
- Varies
- Recovery
- Chargeback
- Settlement
- Days
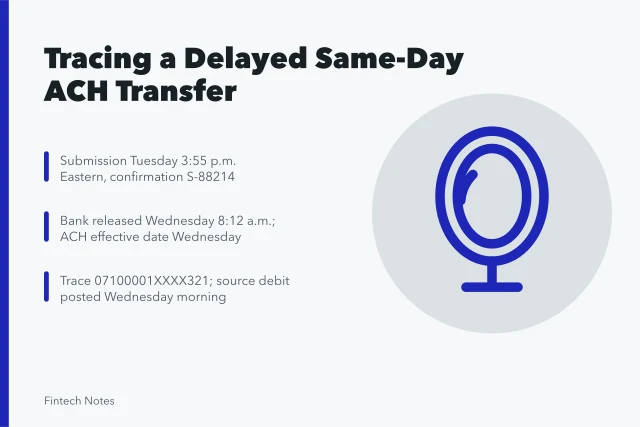
The CFPB's ACH transaction explanation describes ACH as an electronic transfer between banks and credit unions, and notes that what the customer sees as completion can lag the network's own clearing. Hold that distinction when a provider advertises same-day service. Same-day ACH has a submission cutoff, and missing it moves the payment to the next banking day.
Nacha sets three same-day ACH submission deadlines: 10:30 a.m., 2:45 p.m. and 4:45 p.m. Eastern. Settlement follows later the same day.
The Fedwire Funds Service accepts wire transfers from 9:00 p.m. Eastern the previous evening until 7:00 p.m. Eastern. Most banks apply an earlier internal wire cutoff, often between 3:00 p.m. and 5:00 p.m. local time. Confirm that cutoff with the bank before you rely on a late afternoon deadline.
For a side-by-side of what each rail does and when it settles, see the comparison of ACH, wire, instant and card payouts. If both accounts sit at one institution, an internal transfer may clear the requirement without leaving the building.
Compare the route, not just the speed
Compare the route
| Question | Why it decides the outcome |
|---|---|
| Which rail carries the payment? | Sets the processing and investigation path |
| Does the recipient's bank accept it? | Prevents unreachable instructions |
| When does the provider submit it? | Separates your entry from the rail's entry |
| When does interbank settlement happen? | Shows when the institutions move money |
| When can the recipient spend it? | Answers the actual deadline |
| Can it be returned or recalled? | Frames what recovery looks like |
An app's estimated arrival is not a guarantee unless the terms say it is.
Route Comparison Questions
- Which rail carries the payment?
- Does the recipient's bank accept it?
- When does the provider submit it?
- When does interbank settlement happen?
- When can the recipient spend it?
- Can it be returned or recalled?
Price the whole route
Cost / Amount or rule
- Sender fee
- Receiver fee
- Intermediary fee
- Expedited fee
- Exchange-rate markup
- Return or research fee
- Lost discount or late charge if delayed
A high direct fee can be the cheap option for a payment that genuinely cannot slip. A low fee is expensive when the route misses payroll or a contractual date.
Typical U.S. prices, before any relationship discount, are $15 to $35 for an outgoing domestic wire, $0 to $3 for a standard ACH credit, and a currency markup of 1% to 3% over the mid-market rate on an international remittance.
Expedited handling, intermediary banks and the receiving bank's own fee can add to that total. Ask for the published fee schedule and the markup in basis points, because many app screens show only the sender fee.
Total Route Cost Checklist
- Sender fee
- Receiver fee
- Intermediary fee
- Expedited fee
- Exchange-rate markup
- Return or research fee
- Lost discount or late charge
Collect recipient details from a known source
Get instructions from a person you can identify and who is authorized to give them. For a business, keep a vendor master record instead of copying details out of each invoice email, which is where payment-redirection fraud lands.
The usual fields cover several details. They include the recipient's legal name, the account name, the bank name and location. They also include the routing or institution identifier, the account number, and the account type where required. Some wires need intermediary details. A payment reference and a contact are also usual.
Recipient Detail Fields
- Recipient's legal name
- Account name
- Bank name and location
- Routing or institution identifier
- Account number
- Account type where required
- Intermediary details for some wires
- Payment reference and contact
Never infer a routing number from a bank name, and never reuse an old instruction after a merger without confirming it.
Verify through a second channel
Call the recipient at a number already on file or found from a trusted source. Do not call the number printed in the message that changed the instructions.
Second-Channel Verification Steps
- Call recipient at a number already on file
- Read back legal name, bank, routing identifier
- Read back account last few digits
- Read back currency, amount, invoice, date
- Record who verified, when, and how
- Have a second person re-check high-value payments
Read back the legal name, the bank, the routing identifier, and the last few digits of the account. Read back the currency, the amount and invoice, and the effective date. Record who verified it, when, and how.
For a high-value payment, have a second person run the same check independently.
Worked example. An email changes a supplier's account number. You call the accounts payable contact at the number in the vendor master, not the number in the email.
You say that you have a request to change their bank details and ask them to confirm the bank name, the routing number and the last four digits. The contact reads back the routing number already on your record, so the email is a redirection attempt.
You log the date, the name of the person you spoke to and the answer. You do not release the payment.
Match the rail to the job
ACH fits payroll, recurring bills and vendor payments when the recipient accepts it and the timing works. Batch processing and return rules suit scheduled money.
Match Rail to Payment Job
ACH
- Best for
- Payroll, bills
- Timing
- Batch
- Risk
- Return rules
- Check
- Recipient accepts
Wire
- Best for
- Time-critical
- Timing
- Same day
- Risk
- Recall difficult
- Check
- Verify instructions
Instant
- Best for
- Immediate
- Timing
- Seconds
- Risk
- Irrevocable
- Check
- Limits cover amount
Internal
- Best for
- Same provider
- Timing
- Ledger move
- Risk
- Withdrawal limits
- Check
- Statement records
Wire fits time-critical or high-value payments where both sides expect the bank-wire process. Verify instructions before release, because recall is difficult.
Instant payment fits two reachable parties who need immediate availability and whose limits cover the amount. A request-for-payment message is not an obligation to pay it.
Internal transfer fits two accounts at one provider, provided its ledger movement meets the requirement. Check withdrawal restrictions and how the statement records it.
Run a controlled test on new recipients
For a new recurring recipient, send a small amount on the rail you intend to use and confirm receipt through the independent contact.
Controlled Test Steps
- Send a small amount on the intended rail
- Confirm receipt through independent contact
- Log test amount and sender confirmation
- Log trace or transaction ID
- Log recipient posted amount and descriptor
- Log send and receive times
Log the test amount, the sender confirmation, and the trace or transaction ID. Also log the amount the recipient posted and the descriptor they saw. Finally, log the send and receive times.
A clean test confirms the rail works and that the money posts under the details you recorded. It does not prove the recipient account itself is uncompromised.
Separate the roles on business payments
Separate Payment Roles
- Person requesting the instruction
- Person verifying the recipient
- Person preparing the payment
- Person approving it
- Person reconciling it
Split five functions so no single person can both create a payee and release money to it.
- Set up or change the recipient record in the vendor master.
- Approve the payment against the written payment line.
- Release the payment to the rail.
- Reconcile the debit against the approval record.
- Review the exceptions each month.
For material transfers, require two approvals from different people before release. Neither approver should be the person who entered the bank details.
Require fresh approval if the amount, recipient, date, rail or bank details change. An urgent message from an executive is exactly the pressure a control exists to absorb.
Treat a changed instruction as a new request, not an edit. Void the old payment, run the second-channel check again, and log both versions. Never let a released instruction be altered in place, because the audit trail then shows only the final state.
Check the final screen against the approved record
Compare the last screen to your record character by character. Check the source account, method, recipient, and account suffix. Check the bank, amount and currency, fee, and delivery estimate. Check the memo and whether it is set to recur.
Pause if the app quietly changes the method or the delivery date.
Confirm, then reconcile
Save the confirmation and the trace reference. Ask the recipient to confirm the amount credited, not just that a notification arrived.
Reconcile the chain:
- approved request
- bank instruction
- account debit
- rail status
- recipient confirmation
- invoice closed If a link is missing, leave the payment open in your books.
When something goes wrong
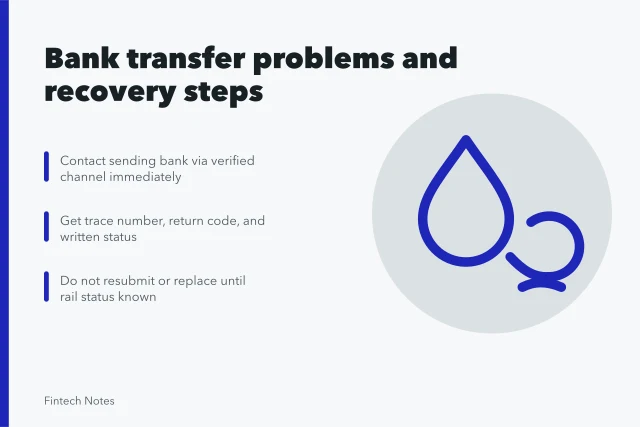
For a wrong recipient, a suspected scam, a duplicate or a material delay, contact the provider immediately. Include the rail, amount, date, recipient, confirmation and the action you want. Preserve messages and approval records.
Do not send a replacement until the first payment's status is known. A delayed payment and a returned payment are different states, and treating one as the other is how people pay twice. If the provider does not resolve it, the CFPB and your state attorney general both take complaints; a licensed attorney can advise on your specific dispute.
Common questions
Should I always pick the cheapest method?
No. Price one row against urgency, whether the recipient's bank accepts the rail, recovery expectations and the cost of missing the deadline. The cheapest route that arrives late is the most expensive one you can choose.
Does one test payment verify a vendor forever?
No. It is evidence for that one payment, not a standing authorization. Reverify any changed instruction through a channel you already trusted, and treat a sudden change of bank details as a reason to stop.
Can I trust the bank name that appears after I enter a routing number?
It catches some typos, and that is worth having. It does not prove the account belongs to the person you intend to pay, because the name check is not an ownership check.
What actually proves the recipient was paid?
The sender's rail reference plus confirmation from the recipient's own bank or account, matched back to the invoice. A notification email alone proves a message arrived, not that funds did.